My Homelab

This will be a quick overview of my current homelab after some of the recent consolidation and upgrades.

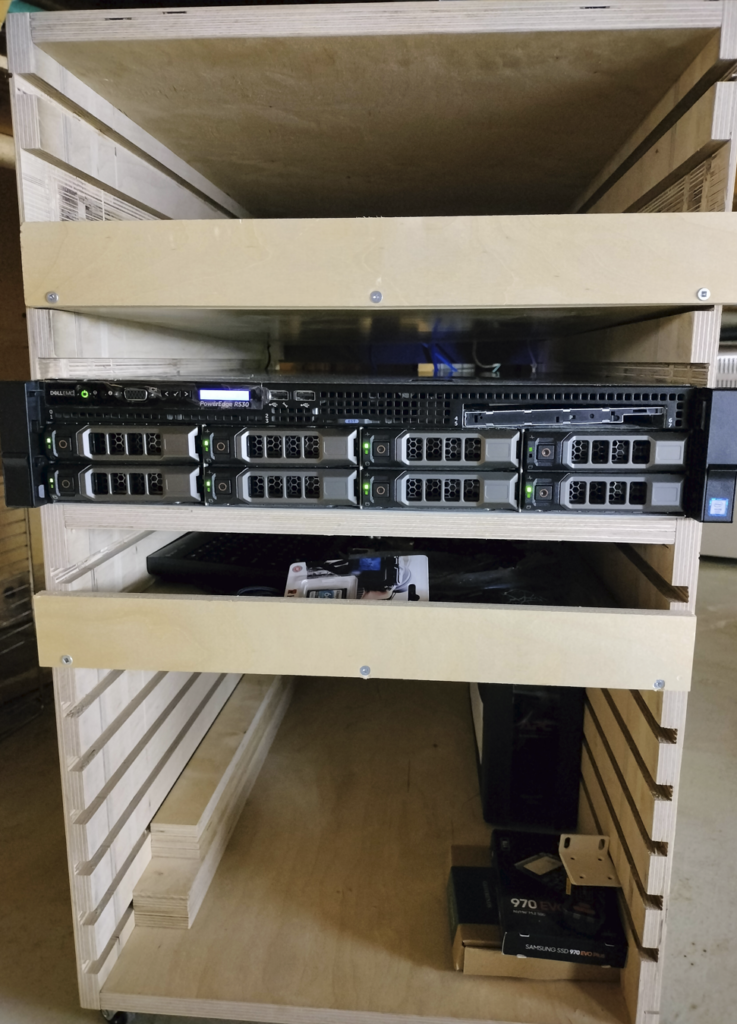
To start off I have a custom (handmade) server rack made to hold all of the equipment. I use trays to hold auxiliary equipment such as keyboards, spare disk for quick replacement and other hardware. Plan is to move my desktop to one of these shelves on my next upgrade.

I have a 1500VA UPS https://www.apc.com/us/en/product/BX1500M/apc-back-ups-1500-compact-tower-1500va-120v-avr-lcd-10-nema-outlets-5-surge/ that meets my needs and covers any power disruptions. I have a RJ45 data-cable connected to my server to auto email on any outages and initiate shutdowns if needed.

For my main workhorse I have a DELL R530 server with 8 3.5 inch bays and a 10G nic. This handles a bulk of my file store, database and processing needs. I run Proxmox as my host and various debain based distributions on my VMs.

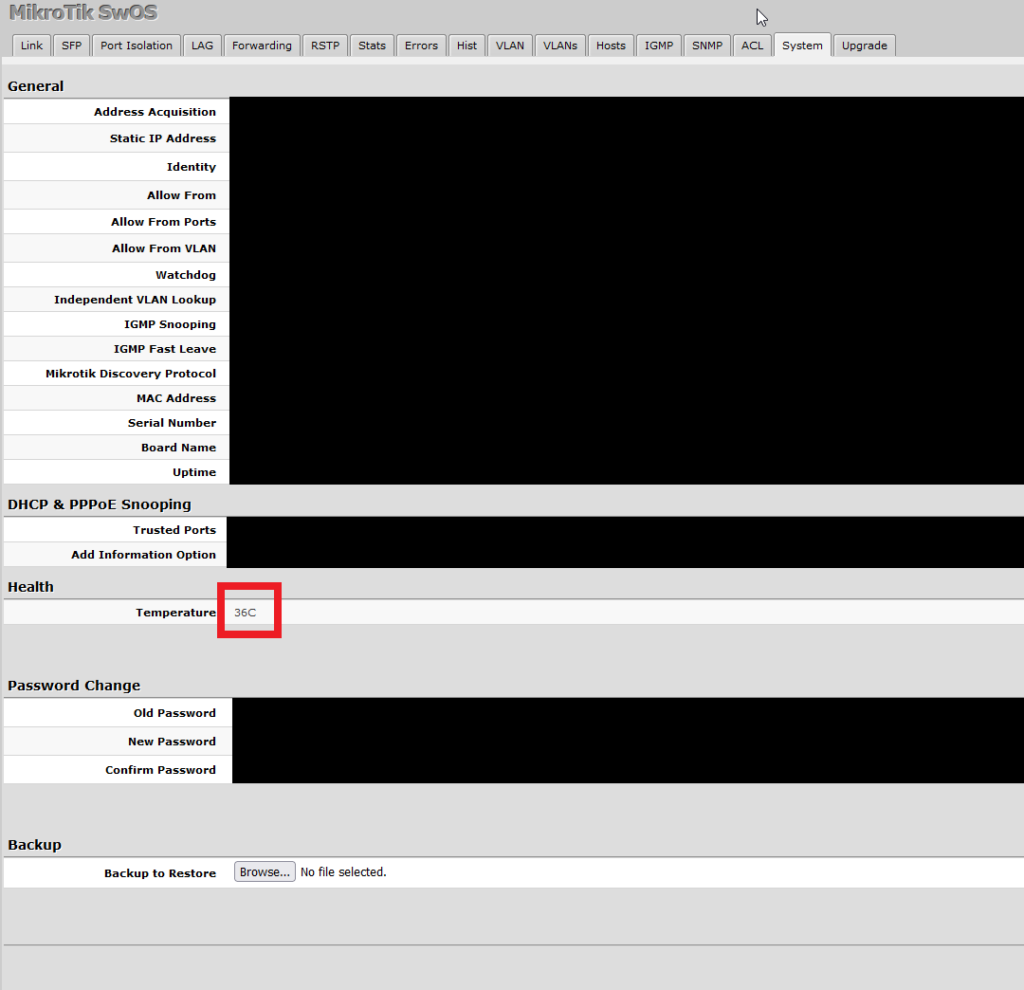
Lastly for my switch I have a Mikrotik CSS326-24G-2S+ which has 2 SFP+ ports that can handle 10Gbps which I use for my server and workstation. For the server I use a cat 6 patch cable and for my workstation I use a fibre optic cable as cat 6 can’t handle the distance. The remaining 24 1Gbps ports are used for various devices.

Adding Cooling Fans on a Passively Cooled Mikrotik Switch

I have recently installed a CSS326-24G-2S+ Mikrotik switch. The problem is that it is a passively cooled switch and runs at 68F in my setup causing intermittent network stutters. To combat this I have added 2 actively cooled fans to the switch. After some poking around with a multi meter I found a stable 24V source beside the power supply. I think this is a common motherboard and the source is used on other models but not on mine.

I added a couple of ~1W fans off of this 24v source to improve cooling. 1 fan is to exhaust hot air and the other is a blower style fan directed at the 2 SFP+ ports that are the most prone to overheating.

After this modification I was able to drop the temperature down to 36C. A simple 2W solution to a comical problem.

Setting up Personal Power BI Dashboards

Microsoft does not allow common individual users to use power BI by requiring the use of either work or school email addresses (https://docs.microsoft.com/en-us/power-bi/fundamentals/service-self-service-signup-for-power-bi). I even tried to use my proton mail account and it didn’t accept it so its blacklist is fairly deep.

One workaround I found is that because I have my own domain (adam-s.ca) I can effectively setup my own custom email address. On my domains service I setup an email forward to pass on all emails sent to xxxxx.adam-s.ca and pass them onto my gmail account. This way I am not paying for a email server and still have access to professional emails ([email protected] :D). This is enough to setup a free Power BI account and have the ability to publish great dashboards.

My Power BI Dashboards

I wanted to share some of my person dashboards that I run off of Power BI.

The first one is my aquarium monitoring dashboard which I use to monitor my KPI. Now its been a while since I did a water change so you can see my TDS is out of spec and I recently moved my turbidity probe to a more appropriate location to properly manage the tank. I have 3 quick cards to see if I am green or red and then further charts to show daily variances and the time series trend at the bottom. I have some alerts that go out when I go out of tolerance but as can be clearly seen I don’t necessarily change my water immediately. (Before anyone freaks out, I have a heavily planted tank so I have a healthy equilibrium that allows me to do infrequent water changes).

Next I have my temperature monitoring dashboard that I use to track 3 main temperatures: my room temperature, my sun-room temperature (and by extension my outside temperature) and my server rack temperature. There is not much to note but I do use the server rack temperature to ensure good operation of equipment. I don’t want to run my server to hot as that my cause early device failure.

Lastly I have my power monitoring dashboard, where I track my desktop computer, server rack and fridge temperature. I track my desktop power usage to understand costs associate with use and to track GPU mining profitability. Server rack power as an important one as well as server hardware is known to be a big power draw. I spent a fair bit of time optimizing power usage and this dashboard was important in tracking those changes.

Overall I have much more work related dashboards but these are the ones I run on my personal Power BI workspace.

The Cost of 10G Networking

Follow up on my previous 10G network install https://adam-s.ca/wp-admin/post.php?post=543&action=edit.

I included a cost breakdown of my 10G networking journey with the total cost being ~$660. There are certain costs that aren’t fully accurate as the Dell server was total 300$ not just the NIC but I included it for full transparency.

Item Cost
Server Dell R530 with 10G 2 port NIC$300
Intel Fiber SFP+ Module$24.99
Mikrotik Fiber SFP+ Module$20.99
Fiber Optic Cable 10M LC to LC$20.99
Mikrotik RJ45 SFP+ Module$69.99
Mikrotik 10G Switch CSS326-24G-2S+RM$145.01
Intel X520 10G SFP+ NIC$79.01
TOTAL$660.98

If I had to go back and change I found that the RJ45 SFP+ modules run hot and would swap it with a full DAC cable but I went with it because that is what I could do with the NIC I had in the server. Additionally I could have gone cheaper on the connection to my workstation but I felt it would be cool to do a fiber optic run with LC cables. I did pay a premium for this but now I can flex and say that my network connection is as fast as light ;).

10G Home Networking

I have recently updated my home network backbone to 10G but my ISP hasn’t gotten the message and still offers only max 300Mbps -_-.

With the recent acquisition of my new Dell R530 server and it’s accompanying 10G nic I decided it was time to upgrade my homelab backbone to 10G. The process was relatively painless and not too expensive. I purchased Intel 10G nics for the remaining computers and a Mikrotik CSS326-24G-2S+ switch to handle the 10G traffic. On top of this (and mainly for the bragging rights) I used fibre optics to connect my main workstation computer but user cat 6 RJ45 for the server.

When stress testing with Iperf3 I was able to achieve 7.41Gbps throughput but finding some stuttering. After investigating I am having some overheating concerns so I will be Jerry-rigging a fan for better cooling.

That being said I am still getting good real work performance with stable 571MBps file uploads and downloads from my NAS but I am seeing some PCIe Gen 3 limitations with my nvme drives that I will try to address on my next upgrade.

Overall this was a very successful upgrade so far and though there are still some open items and lessons learned it has drastically improved usability of the network and system backups no longer bring my network to a halt. Now if only my ISP would get the message and start offering fibre in my area.

Home Dried Peppers

Now that peppers are in season I have an abundance of hot peppers that are more that I can eat or give out. The solution is obviously to preserve them.

A new method I am trialling this year is to dehydrate them in my food dehydrator. I used a combination of peppers namely Chili, Birds Eye & Carolina Reapers and dehydrated them over 48hrs at 125F.

The end product was very successful but a partially expected consequence was that upon initial startup I effectively tear gassed the house as by heating the peppers at 125F I released some of their capsaicin oil. This is a bit of an exaggeration as it was completely bearable but there was a noticeable “spiciness” in the air. For next year I will attempt sun drying them or dehydrating in my sunroom.

Custom Fan Curve For Dell Servers (R530)

I was very happy to get my Dell R530 for what was effectively a steal up until I heard it turn on. For those that have never heard any server turn on, it is close to an airplane turbine spinning up (I am not kidding, my server fans can reach 15K RPM).

Now of course it promptly idled down but the problem I had is that it was idling at around 20% (3000RPM) which produced a noticeable hum that could be heard 2 floors up. There are some extenuating circumstances as I had added a few PCIe devices that cause Dell to compensate but that is aside from this.

A background note on fan curves and how computers stay cool. Dell servers have a fan curve which dictates the PWM output % for the system fans based on the air temperature. The problem is that these servers are designed to run with cold refrigerated incoming air in datacenters and in my condition 20c ambient translates to 20% fan speed and it is hard for me to go lower.

In a weird twist of worlds the consumer space already had a solution for this: the custom fan curve. In the consumer space, end users are able to adjust the original fan curve to what is best for their use case instead of being forced into the OEM curve.

To do something like this on a dell server is a bit more difficult though. I had to borrow from a github project where the host machine measures cpu temp and then issues IPMI commands to manually set a speed. Through this we can make a makeshift fan curve and I have shown mine below. This curve is a more user-centric where under idle conditions (<40c) fan speeds are relatively low and only ramp up when needed. This provides a good balance of thermal performance under load and loudness at idle.

Now the server is not bothering anyone at idle and I don’t have to worry about over temperature while under significant load.

Using DD to do Bare Metal Backups

I have been using Proxmox as a server OS for >5 years now and have had a very robust and tested backup procedure for all of my VMs. The problem is that though I have a good setup for the VMs I have a very poor system for backing up my Proxmox host.

The solution to this is DD (Data Description) which is a very powerful and dangerous tools for data manipulation. It can handle wiping drives by writing “0” to the entire disk or pull data between sectors on a damaged disk. In my scenario I use it to create a disk image that is a 100% copy of my host.

sudo dd if=/dev/sdX conv=sync,noerror status=progress bs=64K | gzip -c > /media/XXX

To do this I boot into a virtually mounted Xubuntu iso (Thank you Dell IDrac for virtual media). I locate my Proxmox host disk and run the command. It pipes the host disk right into gzip to compress the file and then saves it on the onboard USB.

The dd command paired with gzip makes it an exceedingly attractive backup solution as it is a full bare metal backup that is compressed so the empty space doesn’t fill up the backup.

There are concerns with using dd as a backup, namely with bit rot where if 1 bit is flipped it can mess everything up but to remedy this I am taking multiple backups and I am hosting this in a RaidZ ZFS pool that can catch bit rot.

Most importantly of all, “You don’t have backups unless you tested them” and I was able to successfully recover using this method making it my go to for low level backups.

CI Power Savings at Home

With new power monitoring plugs (flashed with custom Tasmota firmware) I wanted to have a look at my server rack power usage and see if there were any savings opportunities. I ran a “top" command on the VM that had the highest usage and found that my database (PostgreSQL) was running higher than I think it should. I started to go deeper into the jobs running on the database and found some stuck system jobs. I was able to resolve most of them and implemented a query timeout to prevent anything from going to long and was able to go from a mean 104 W down to 90W presenting a 14 W savings. This may not be much but this server runs 24/7 and so will accumulate over time.

I made a quick I-chart to show the power savings the the optimization period where I was hammering the server to figure out what was going on. There are still some cyclic increases in power that are related to clean up jobs.